Upload pages (or Seald FileDrop)
Clicking on the Upload Pages tab on the left side of the screen takes you to the list of the upload pages.
Each upload page is characterized by :
- the name of the page;
- the recipients;
- the type of the page.
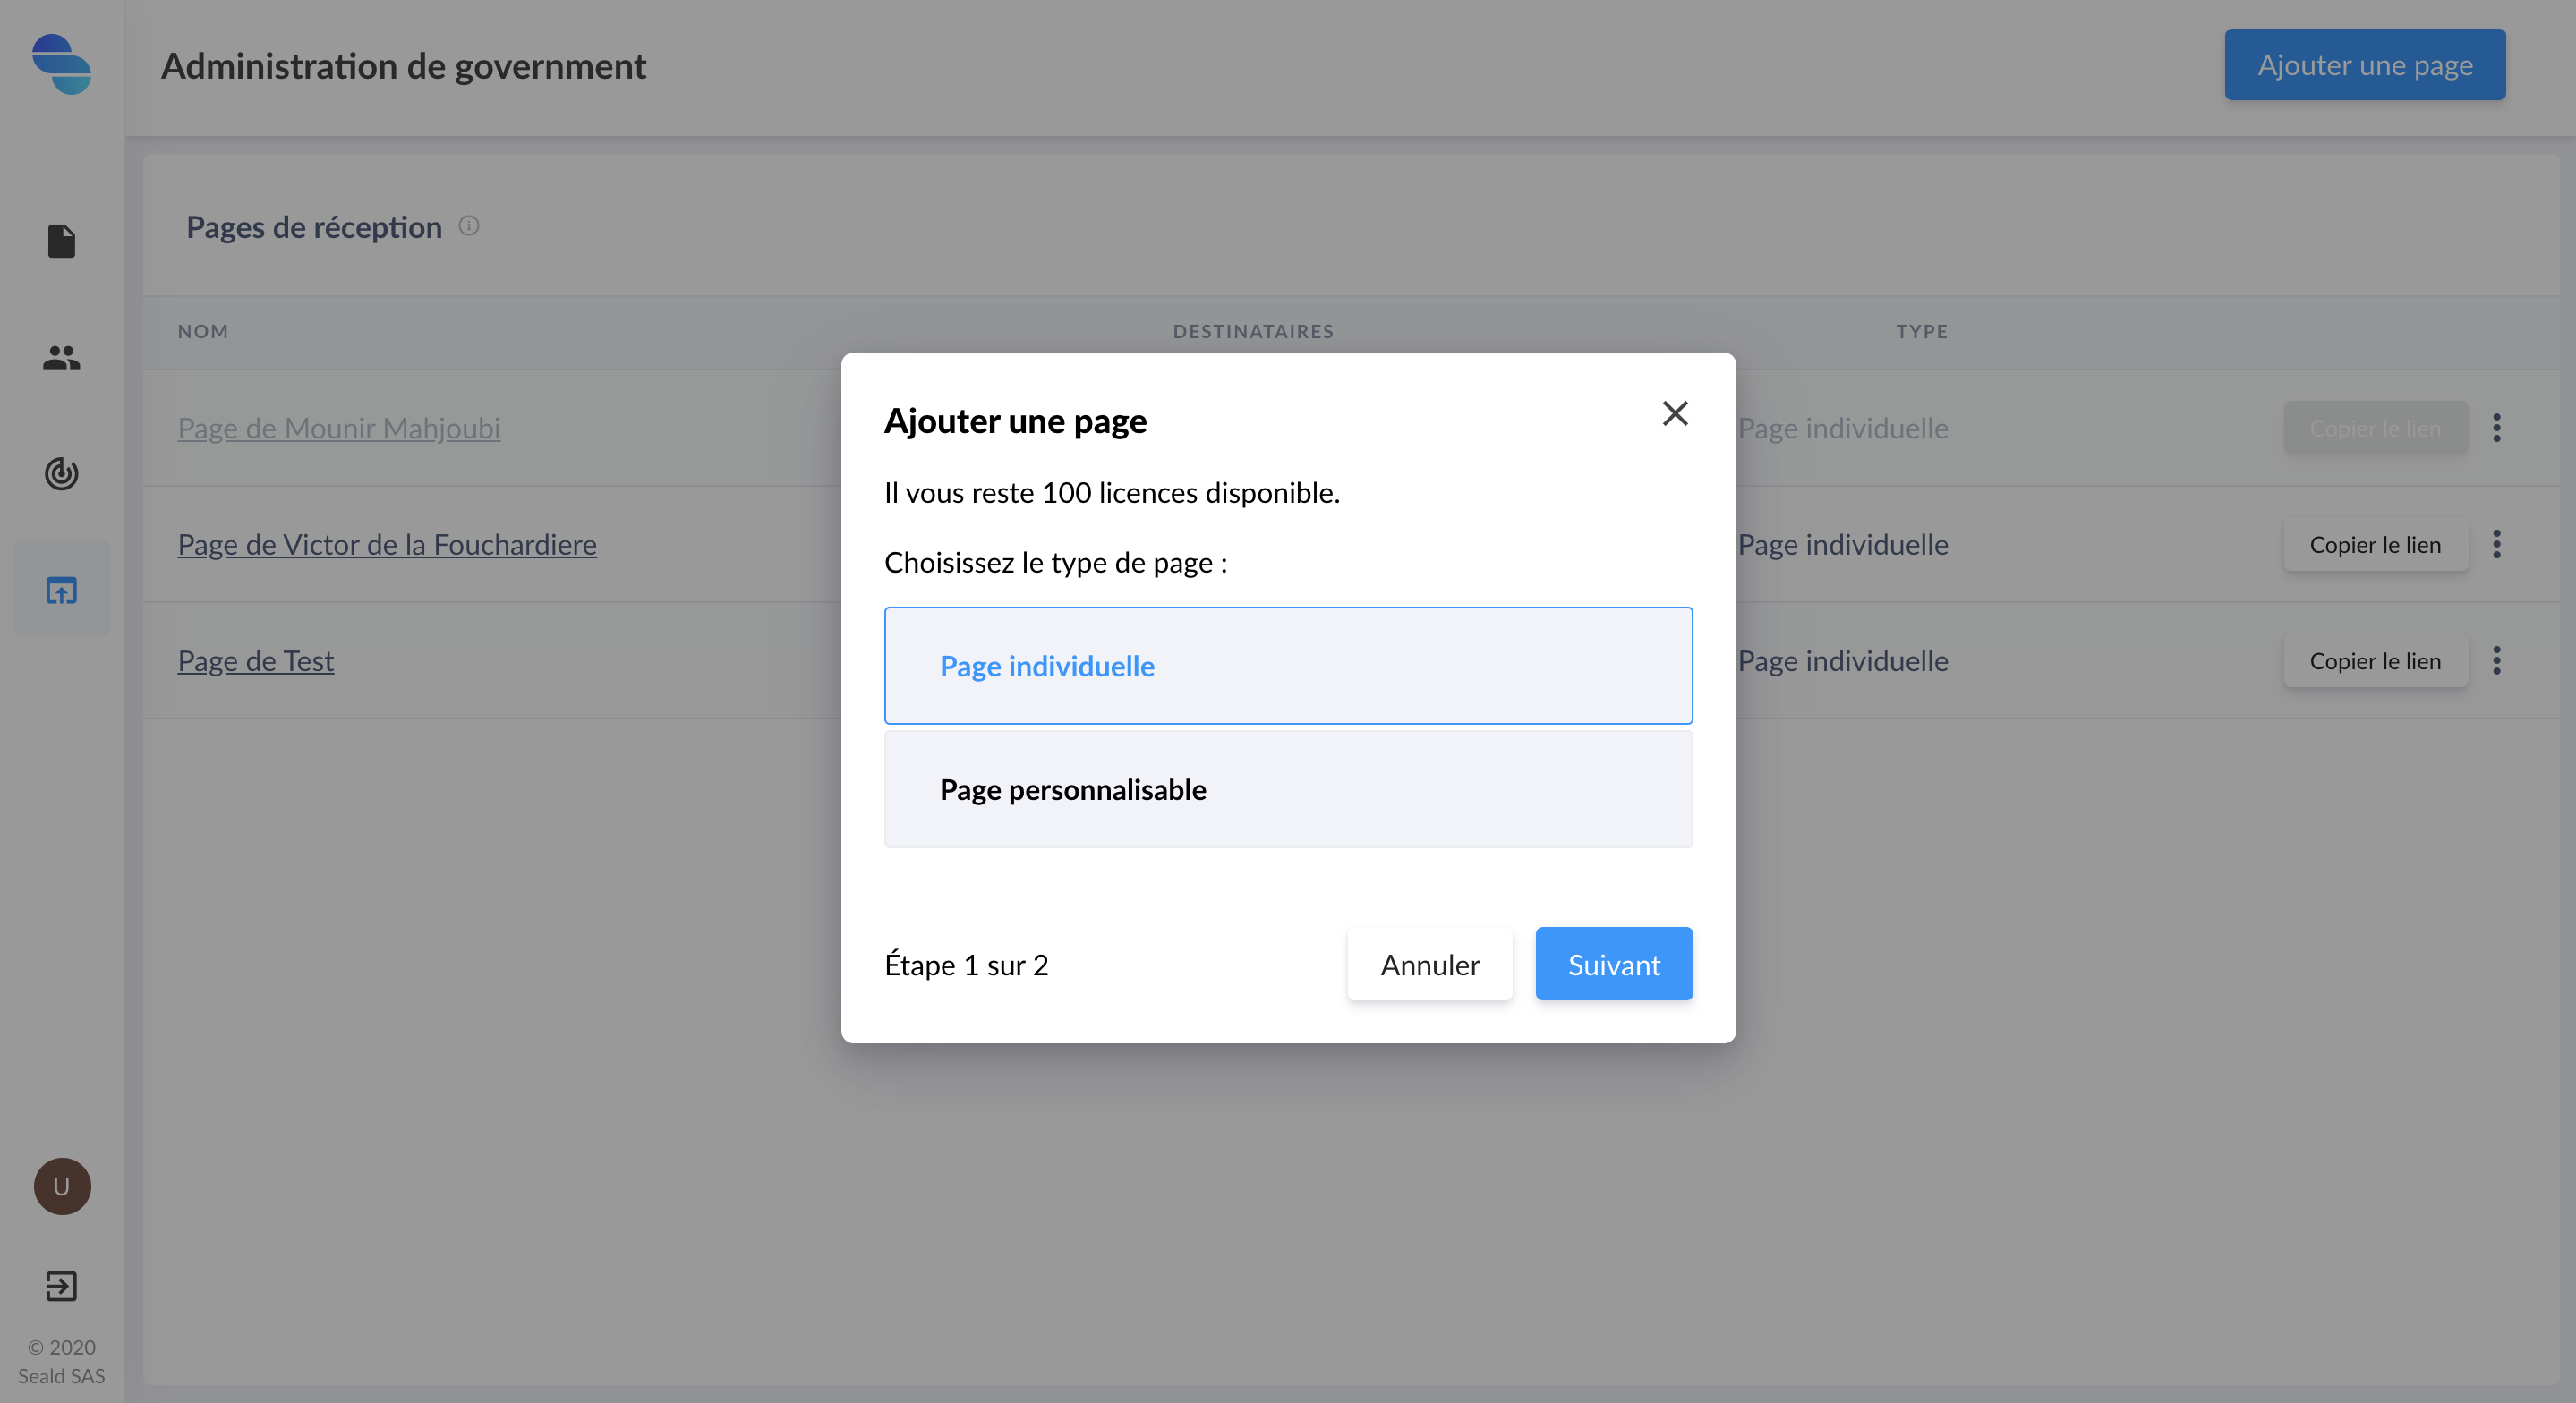
Create an upload page
Personal page
You have the possibility to create an personal page to protect and send files directly to a single user. Files sent via this page will be encrypted with Seald technology before being uploaded.
TIP
Note that the creation of a personal upload page is included in the license for each team member.
 |
| Creating a personal page |
Then select the desired contact. Note that you can only create one personal page per user.
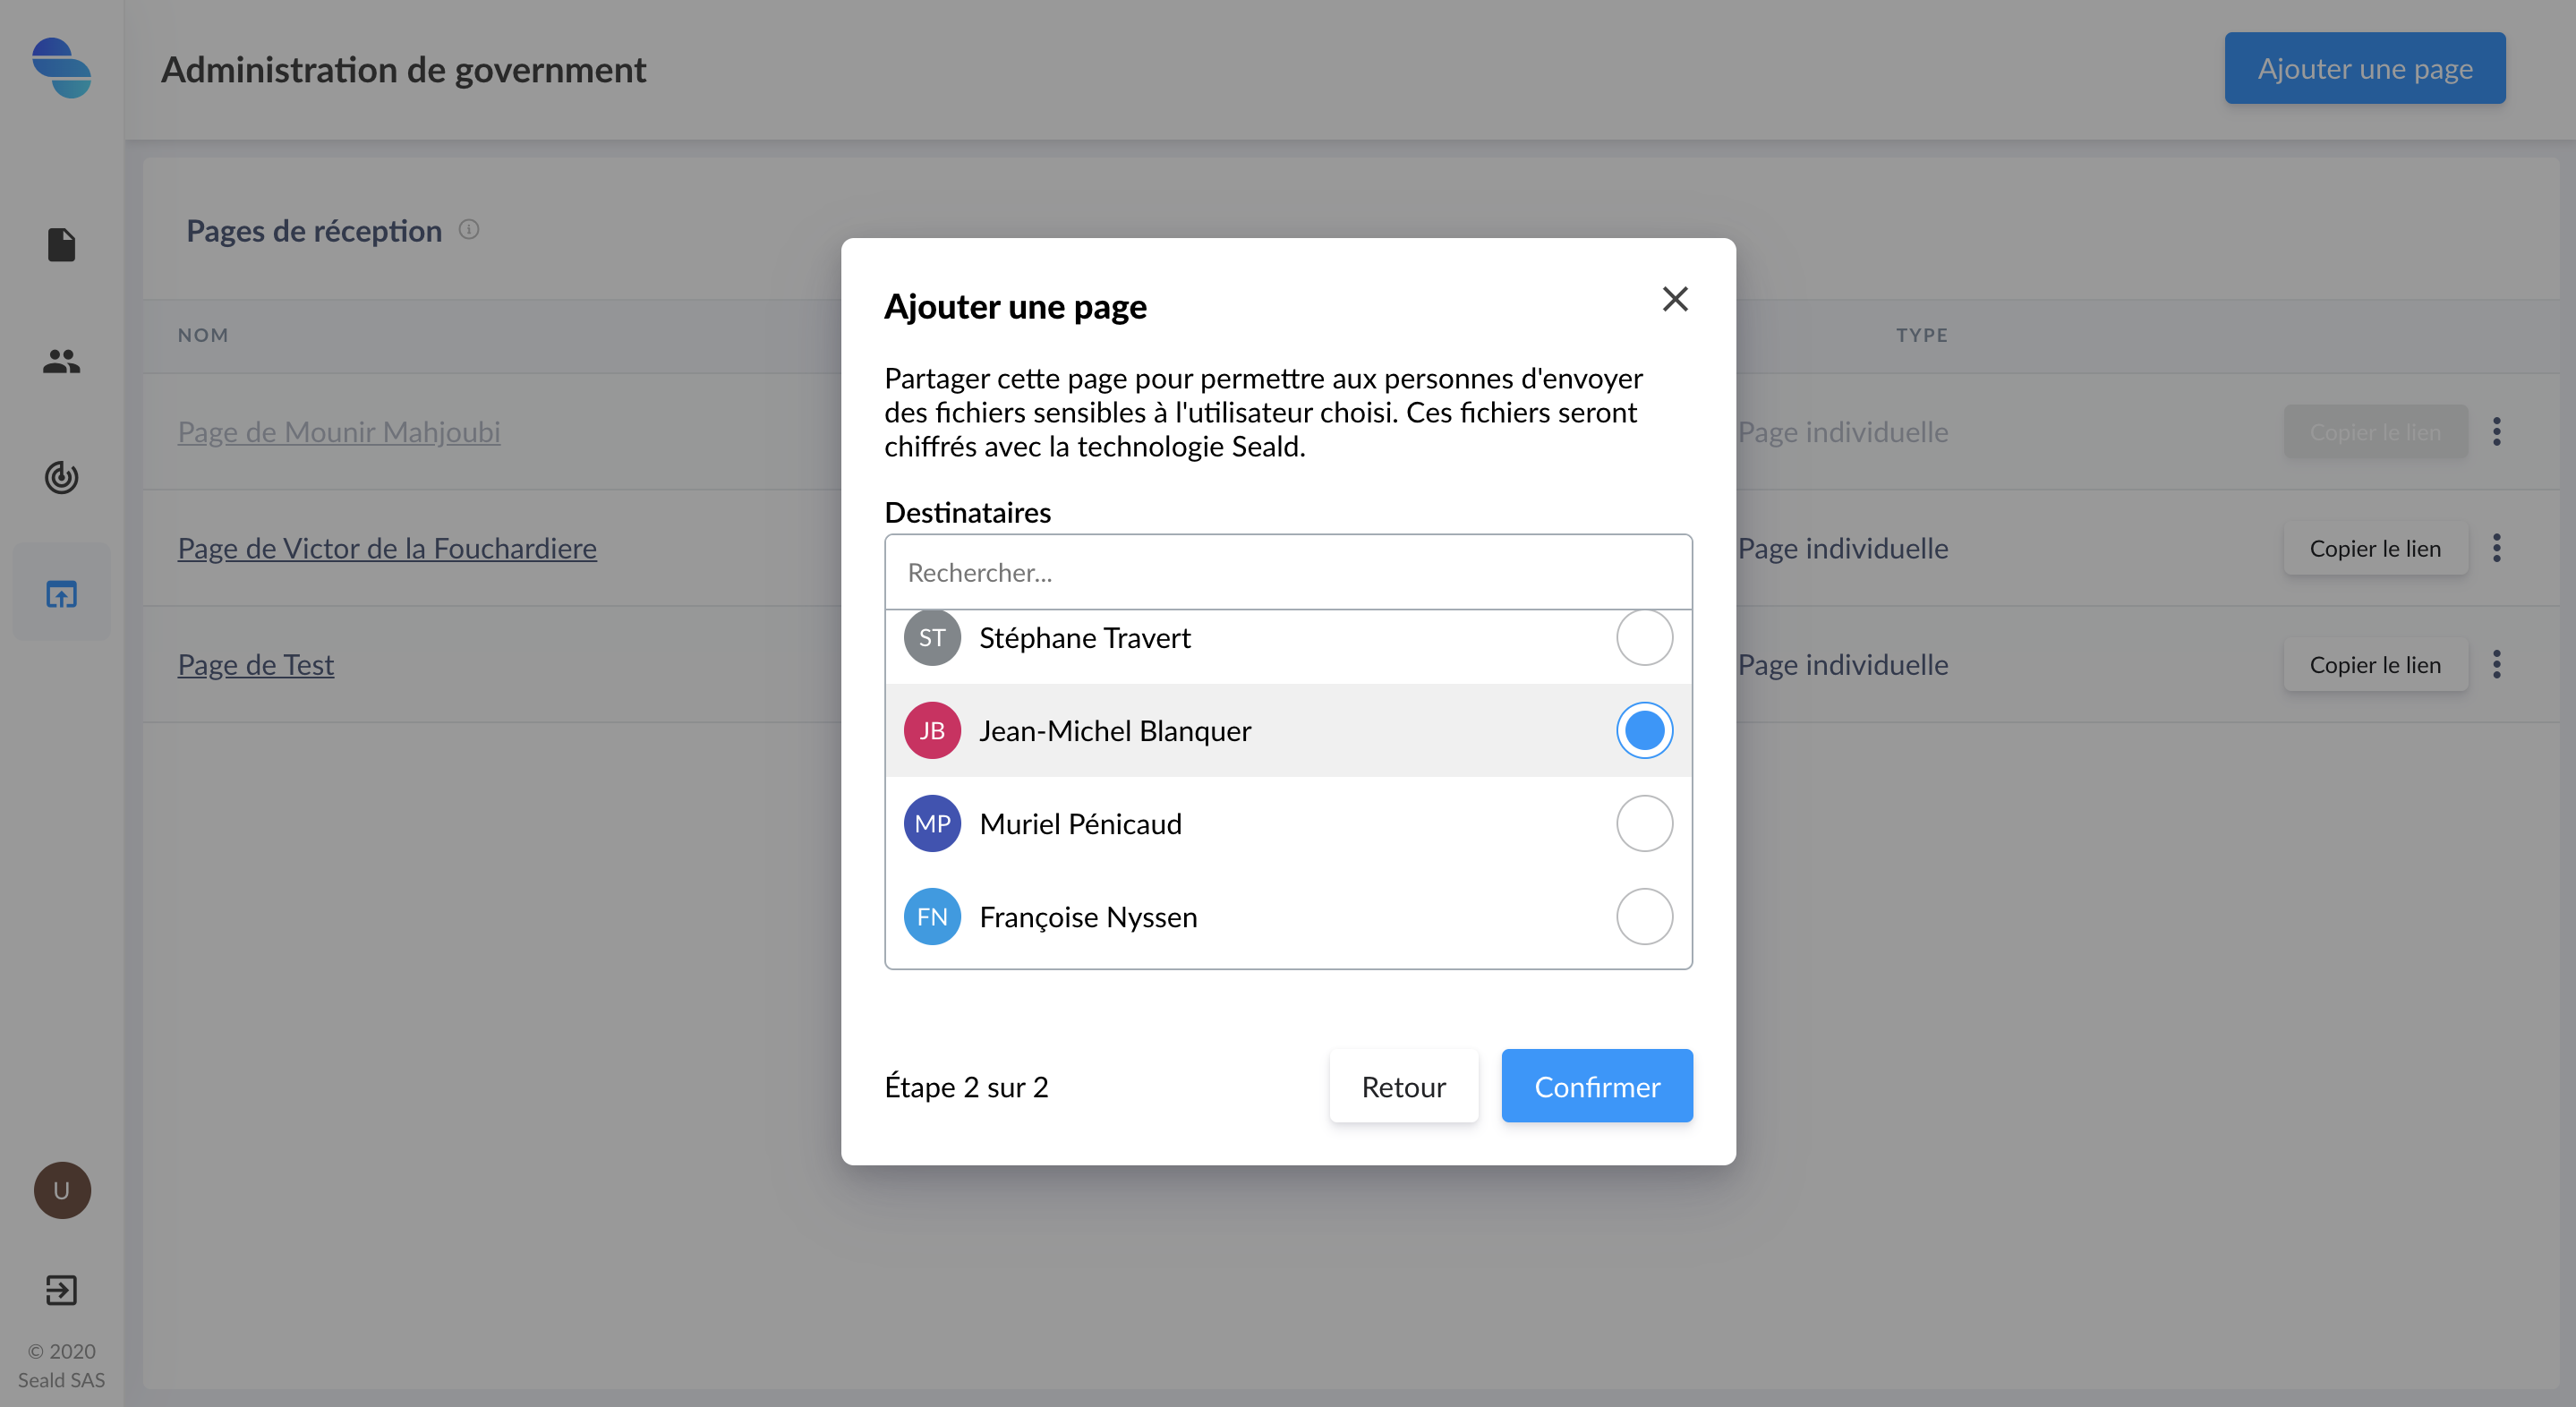 |
| Selecting a user |
The unique link to the file reception page you just created is then given to you, allowing you to access it directly.
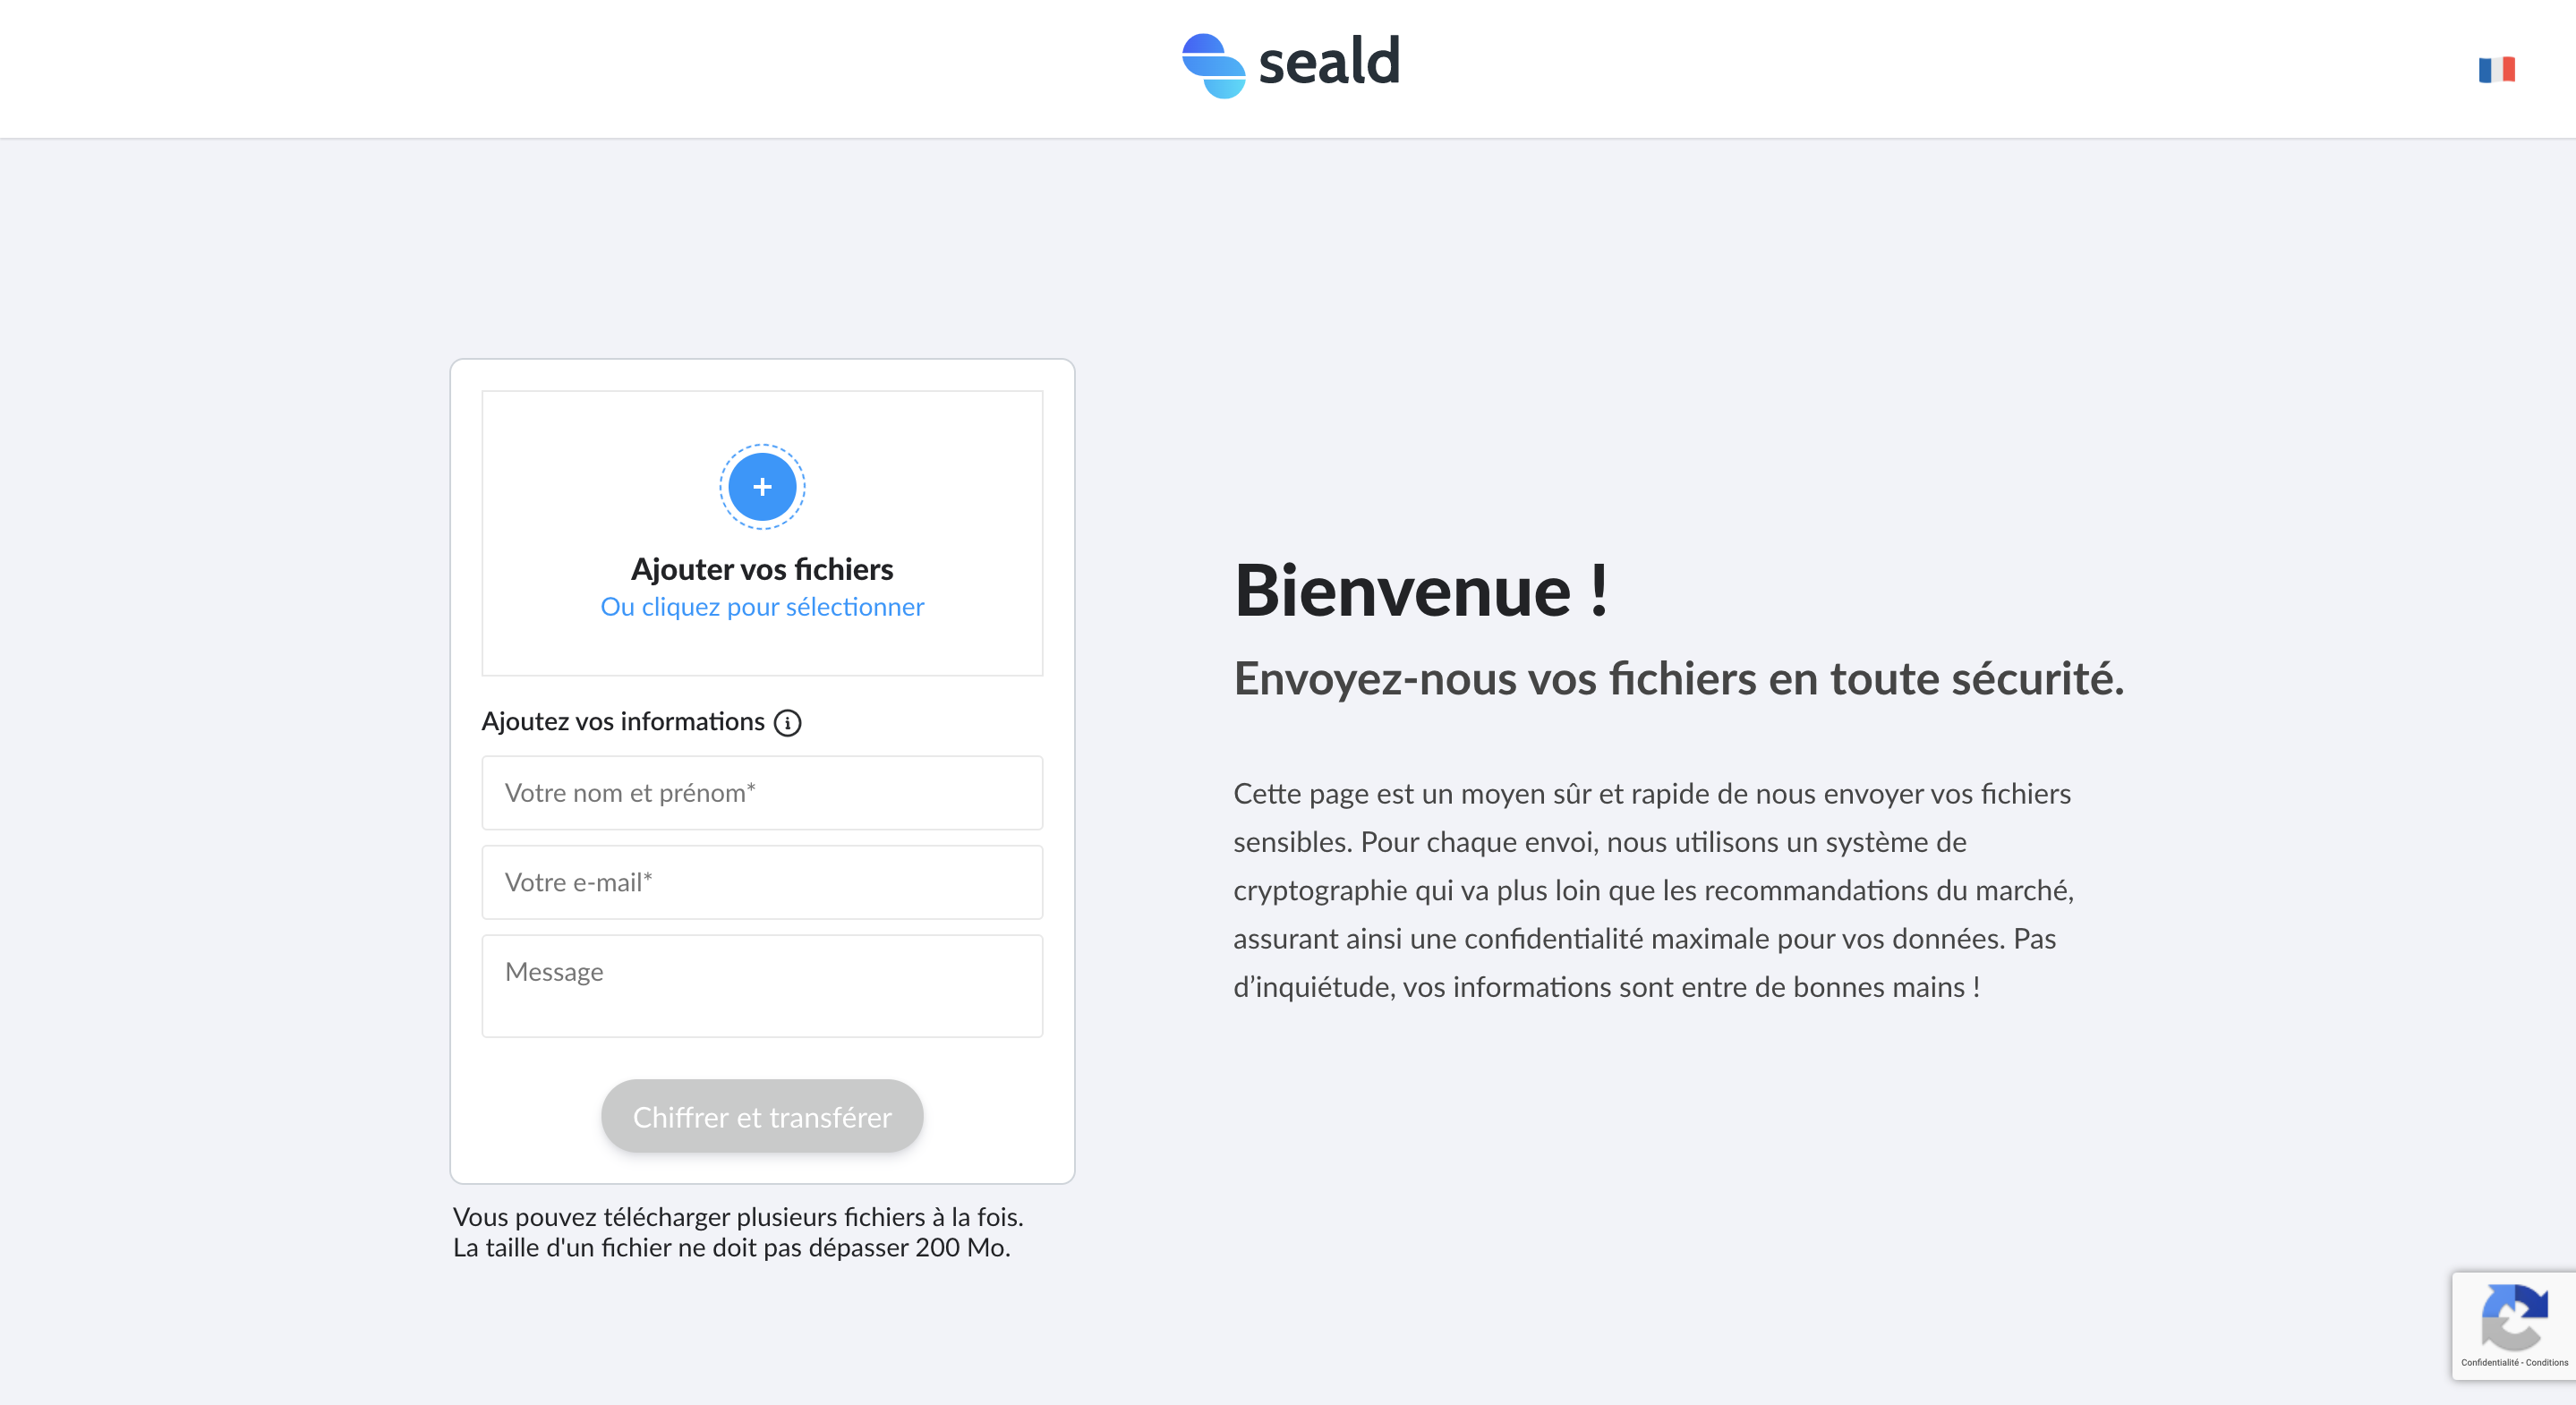 |
| Single page |
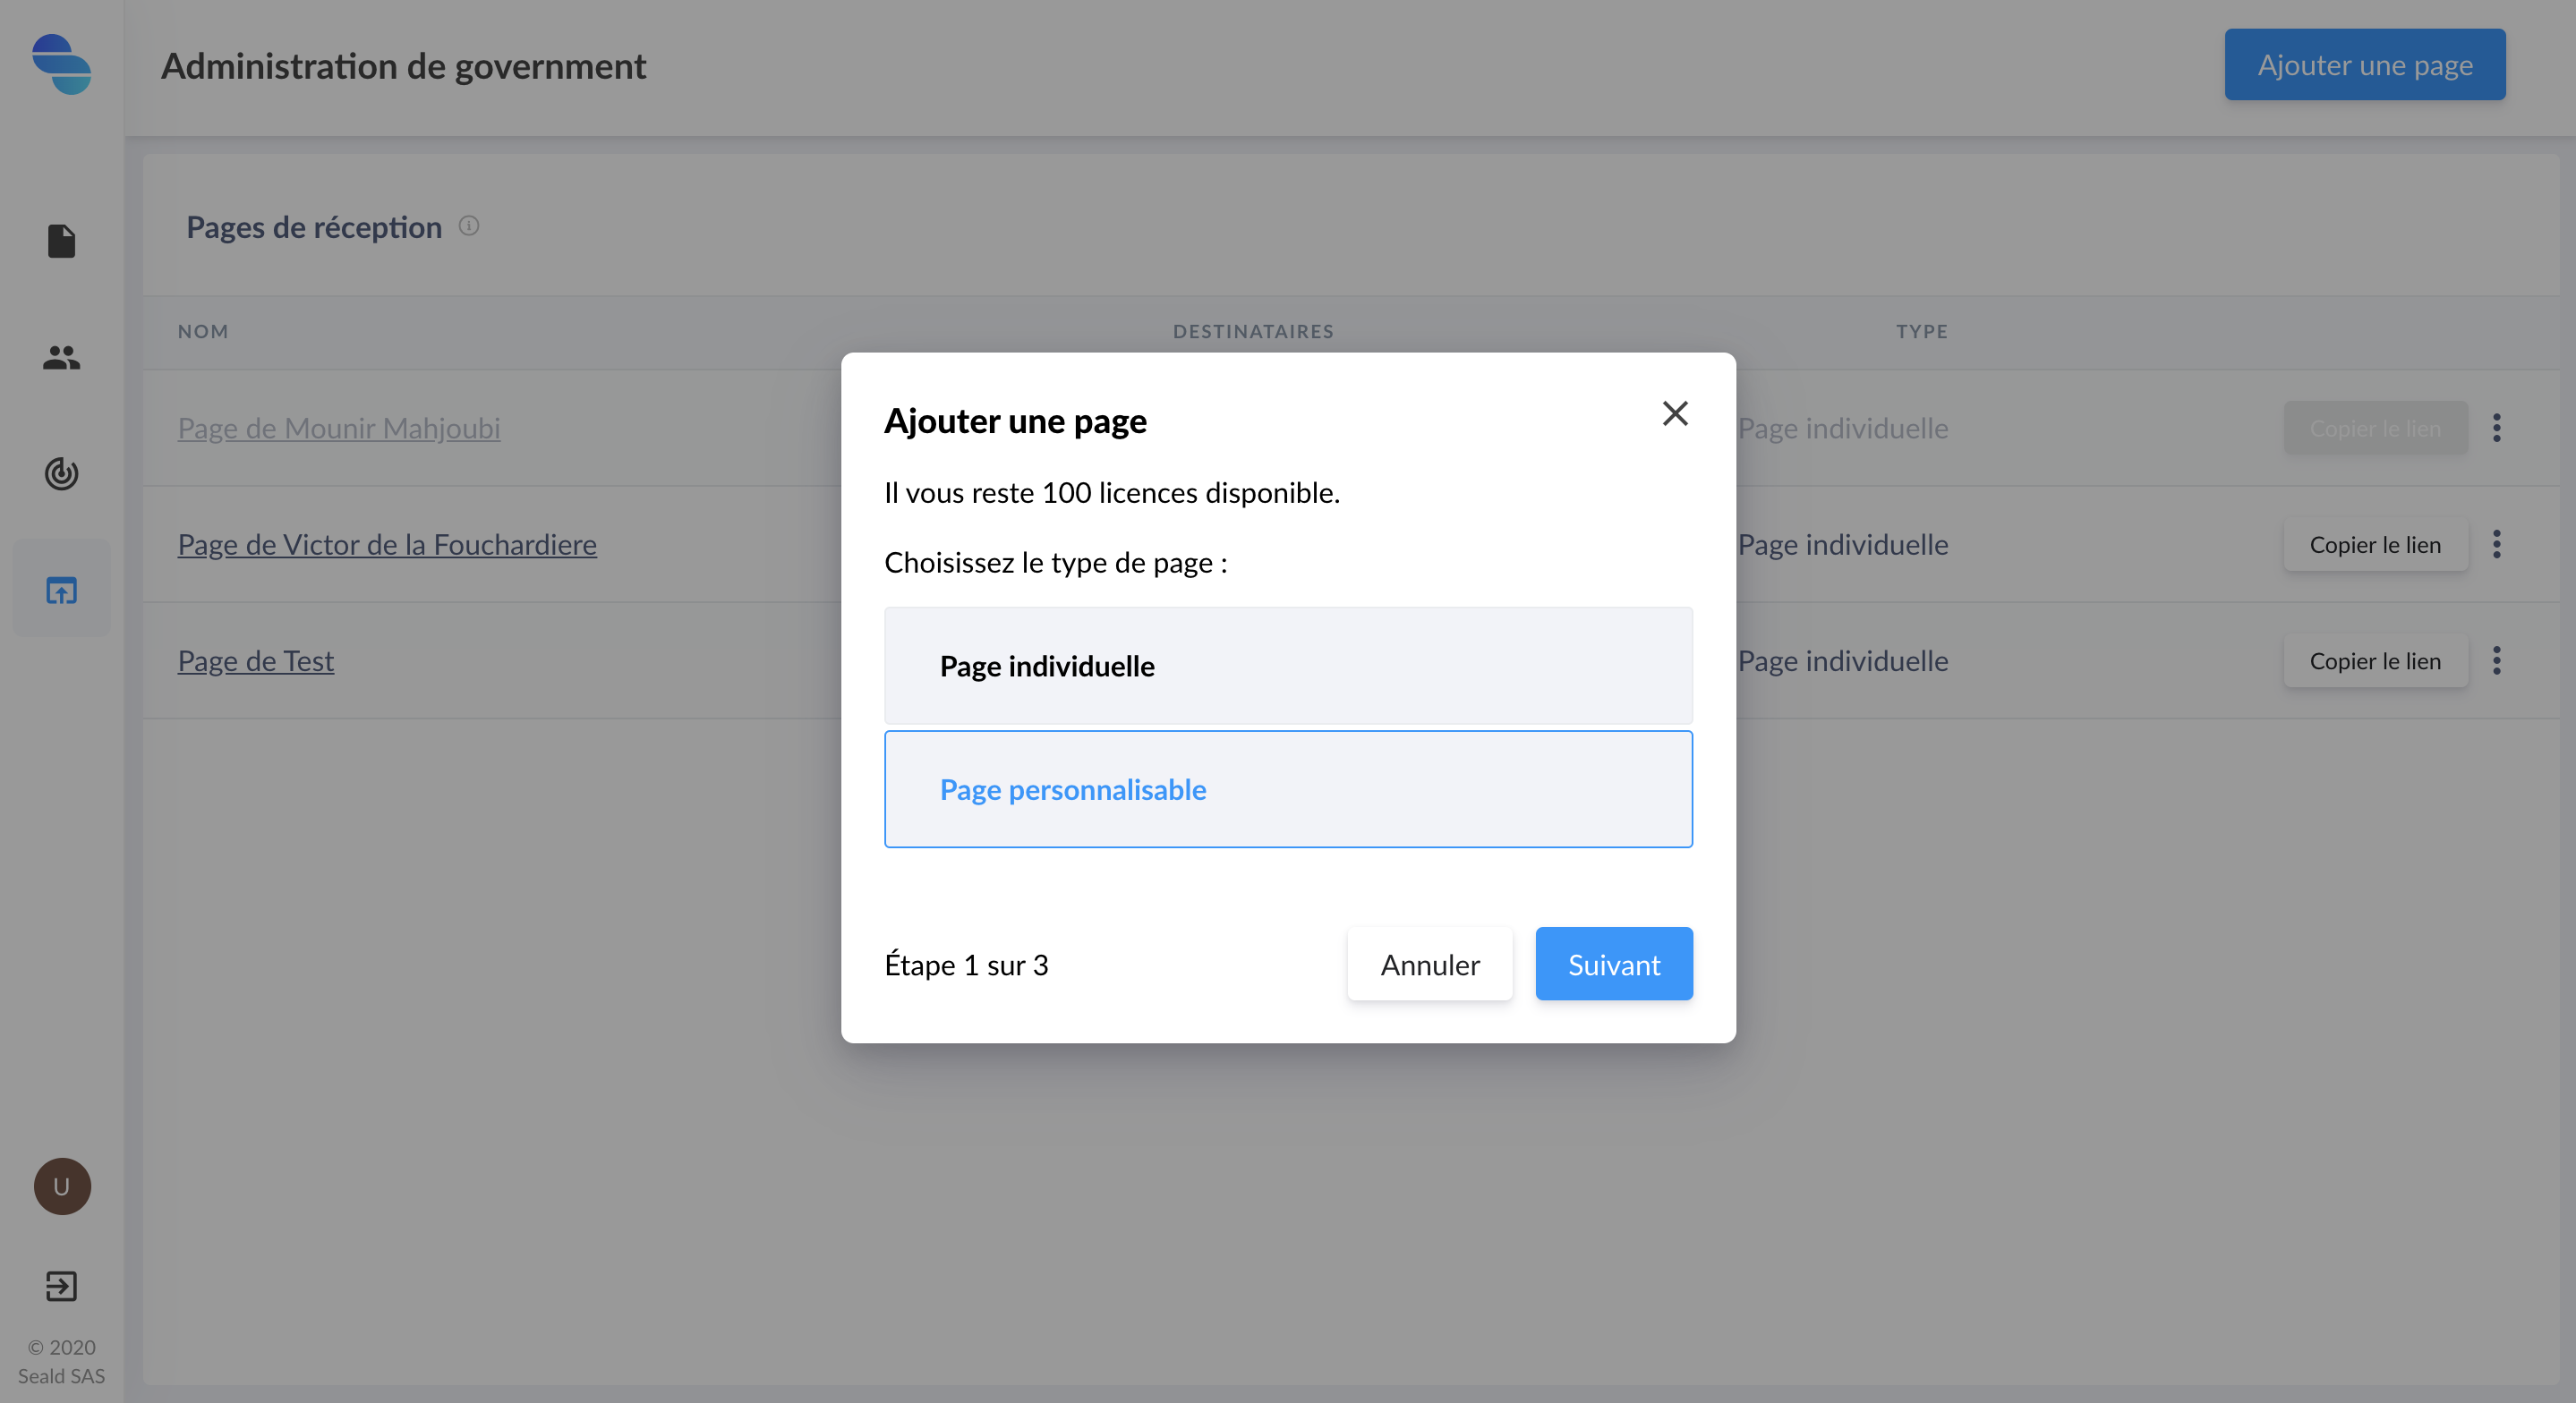
Customizable page
You can create an customizable page to protect and send files directly to many users. Files sent via this page will be encrypted with Seald technology before being uploaded.
The creation of a customizable page is similar to the creation of an personal page, with some additional possibilities:
- select multiple recipient users;
- customize the title, logo and description of the receiving page;
- customize the URL suffix (example: send.seald.io/send/to-customize).
TIP
Note here that creating a customizable Seald FileDrop page will consume 1 license!
Click on the Create Page button and choose Customizable Page.
 |
| Creating a customizable page |
Then select the users and click 'Next' to proceed to the customization step.
|
| User Selection |
You have the possibility to customize several elements (optional):
 |
| Page customization |
the URL suffix of the file receiving page (example:
totowill givehttps://send.seald.io/send/totoif it is not already taken).The logo provided must be in png or jpeg format.
A title that will appear at the top of the page.
A text that will introduce the user as soon as they arrive on the page.
A link will then give you direct access to the Seald FileDrop page you have just created.
|
| Custom page |
Edit a customizable page
You have the possibility to modify a personalized page. To do so, click on the 3 small dots of a page on the right side of the table, then Modify page.
Disable/Reactivate an upload page
Deactivating a Seald FileDrop page means that you can no longer access it. You will have the option to reactivate it later.
TIP
Note that disabling a custom page allows you to retrieve a license.
To deactivate a page, proceed as follows:
Click on the 3 small dots of a page on the right part of the table, then Deactivate page.
 |
| Deactivate page |
For the reverse behavior, the process is the same, click Re-enable page.
 |
| Re-enable a page |
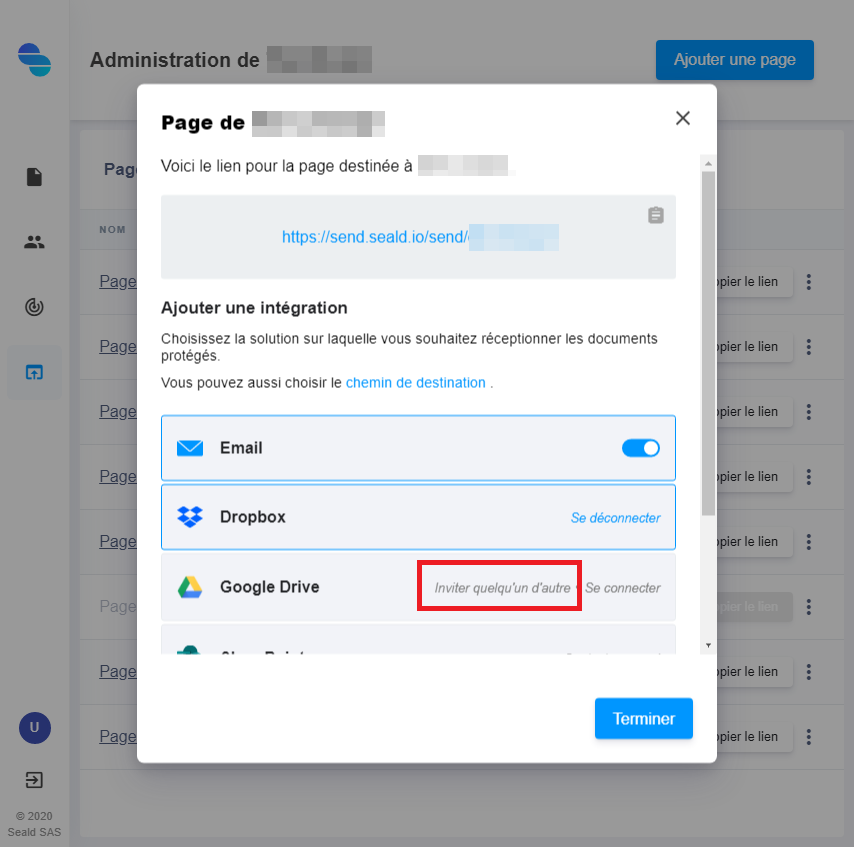
Connect an upload page to a third party Cloud hosting service
By default, the upload pages transmit the protected files through links sent by email to the recipients of a page. It is also possible to connect the upload page to third party Cloud services (such as OneDrive, Exchange, Dropbox, GDrive).
The configuration of these parameters is done on the last upload page configuration screen.
Connection with a service managed by the administrator
(This paragraph only concerns Dropbox and Gdrive connections, for other services, please contact support)
In case the administrator, having access to the dashboard, also has access to the service to which the page needs to be logged in, the administrator just has to click on "Login".
A connection request with the desired service will then be proposed in order to connect the page to the service.
WARNING
It is currently not possible to connect multiple upload pages to the same Cloud hosting account. If you connect a second upload page to the same hosting account, the first one may be disconnected.
Connection with a user-managed service
(This paragraph only concerns Dropbox and Gdrive connections, for other services, please contact support)
In case the administrator, having access to the dashboard, does not have access to the service to which the page should be connected, he can send a login request to a user having access to the service.
All the administrator has to do is click on "Invite someone else".
It will then be necessary to enter the email address of the user who has access to the service.
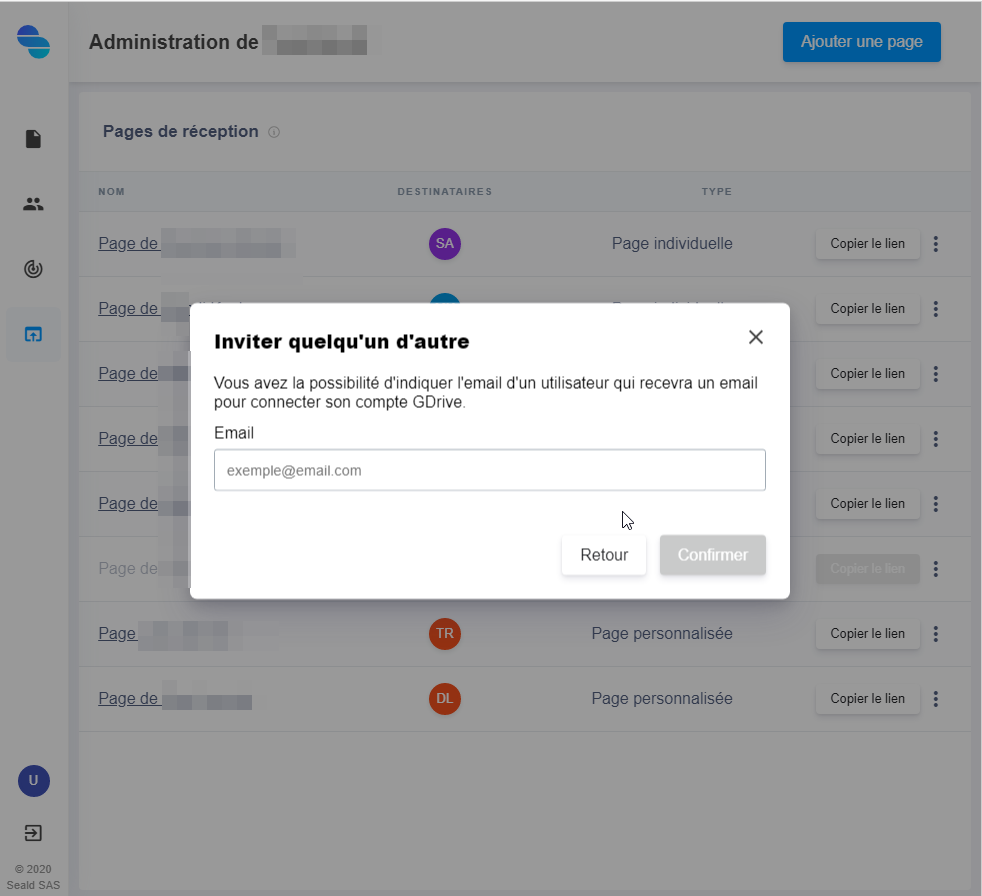
The user will receive by email a link leading to a connection request with the desired service will then be proposed in order to connect the page to the service.
WARNING
It is currently not possible to connect multiple upload pages to the same Cloud hosting account. If you connect a second upload page to the same hosting account, the first one may be disconnected.
Customize the location and name of transmitted files
Once the page is connected to one or more hosting services, when a person transmits files via the page, the files will be automatically transferred to the default folder, and will have a name of the same name. following this format : {YYYYmmddHHMMSS}-{file_id}-{filename}. For example, if someone transfers the file fichier.pdf, the name of the uploaded file will be : 20200602183055-1-fichier.pdf.
This is not a "user friendly" file name and it is possible to set both the location of the file (for example to make a folder by email from a sender) and the name of the transmitted file. To do this, click on "Location" :
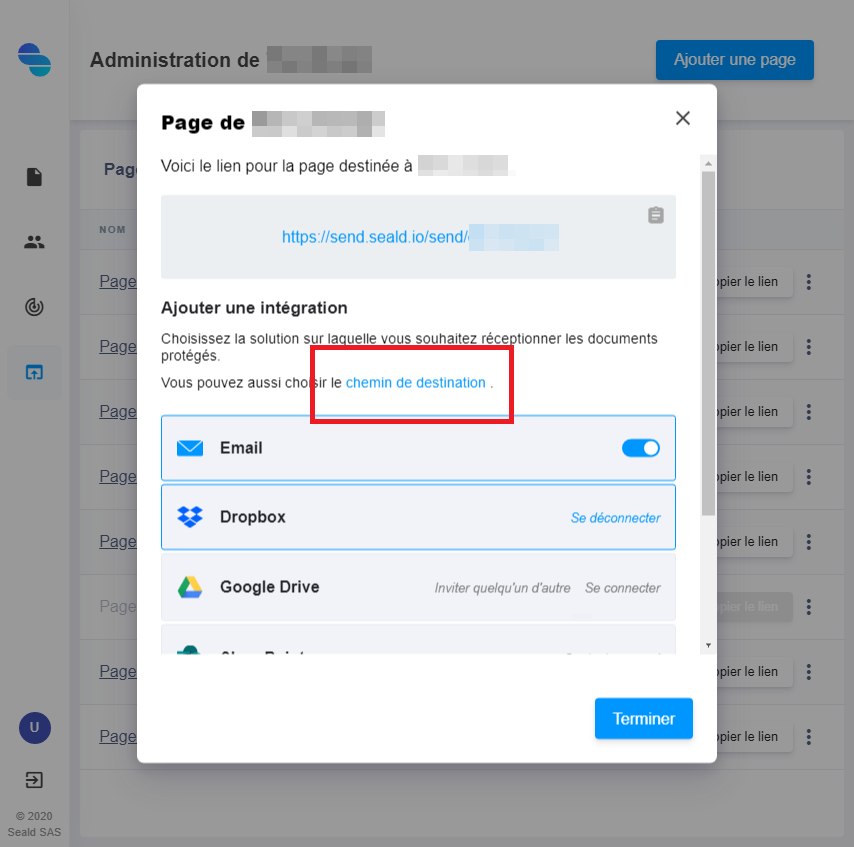
And then fill in the format of the filename to be transmitted.
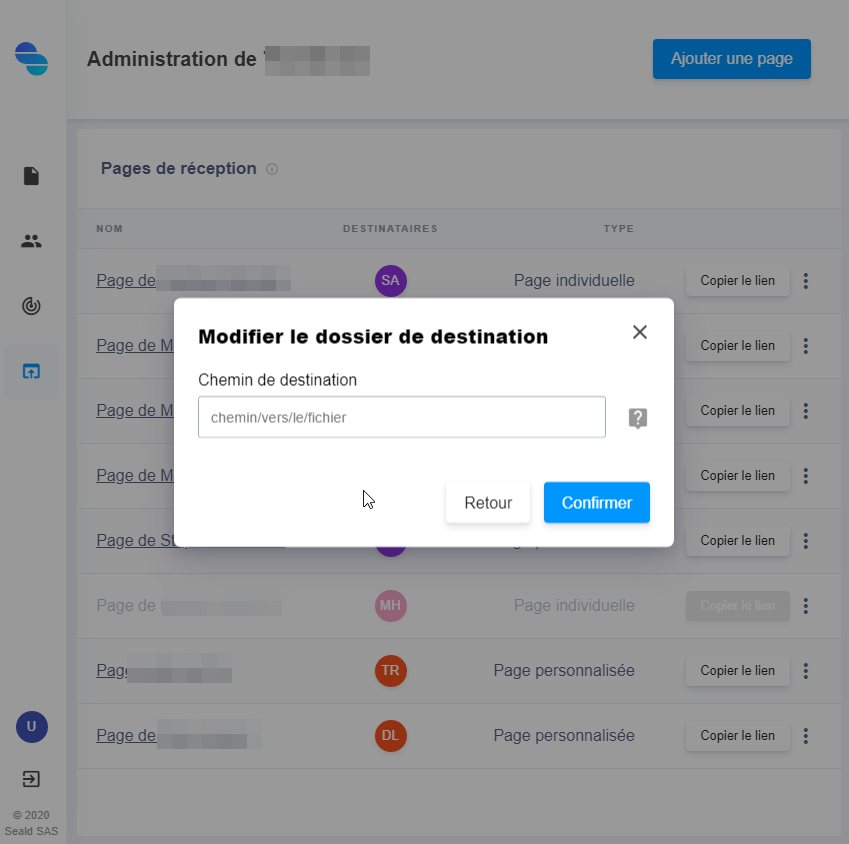
To customize the folder and the name of the file to transmit, several parameters are available:
| Nom de la variable | Fonction |
|---|---|
%UPLOADPAGE_LABEL | Label of the page |
%UPLOADPAGE_FRIENDLYNAME | Customized URL of the page |
%UPLOADPAGE_NAME | Name of the page |
%UPLOADPAGE_UUID | UUID of the page |
%UPLOAD_ID | ID of the upload |
%UPLOADER_NAME | Name of the uploader |
%UPLOADER_EMAIL | Email of the uploader |
%FILE_I | ID of the file |
%FILE_NAME | Filename |
%FILE_DEFAULT | Filename and timestamp |
%Y | Year |
%m | Month |
%d | Day |
%H | Hour |
%M | Minute |
%S | Second |
WARNING
If you don't use a variable, all files will go in the same folder, and have the same name. In most cases, this will render the page unusable.
Whether using variables or not, if the name and location of a file to be transmitted are the same as an existing file, the existing file will be replaced.
For example, if you want to make one folder per year, containing one folder per transmitter, with its files in it, you can use the following configuration: %Y/%UPLOADER_NAME/%FILE_NAME. So, if the user Alice transmits the file file.pdf, the file will be transferred to the 2020/Alice/ folder and the file will have the name file.pdf.